Thursday, September 26, 2013

Flower Nail Art tutorial

So I know that summer is coming to an end, but I just had to use some of my bright Bondi colors to create a floral nail art mani. I decided to take pictures throughout the process so I could share with you how I got this look.

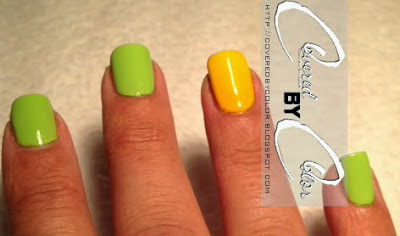
The colors I used for this mani are: Bondi "Limelight", "Fuschia-istic", "Brick Road", and Essie "Tangerine."
To start this look, paint each of your nails a base color that you desire. I made my ring finger my accent nail, do did that a different color. I decided that these base colors would also be the center of my flowers.

Next, using a dotting tool, or a bobby pin tip, paint five small dots in a circle pattern creating the petals for your flowers.


Using your dotting tool, add dots to the center area of your flowers. I used Limelight on my accent nails and Brick Road on my other nails.


To finish it off, I used a toothpick and added black lines as stems.


You can purchase Bondi polishes HERE . There is even an option to choose a monthly subscription box. I highly recommend Bondi polishes. They are vibrant, smooth, and best of all their customer service is top notch.
 
EDIT: While I do enjoy the polishes themselves, and they are of wonderful quality, I am recommending at this time that you be careful of any purchases from this company. They have a habit of lying to customers about shipments, bouncing refund echecks or not refunding people as promised, and outright poor customer relations by the business owner.
 
SECOND EDIT: After the audacity of the owner and CEO of Bondi to rename the fall/winter line (you know the line he ALREADY had in his possession) with insulting names such as "It's Only Polish" after robbing people of their refunds, I am not in any way shape or form endorsing their merchandise. I am actually going to inform you to STAY FAR AWAY from that company. Use another set of colors to create this mani! I am even considering removing this blog post and replacing the whole thing. *sigh* So disappointed!

These polishes were not provided to me for review or swatching by the company. I purchased these polishes and they are part of my personal stash.

Wednesday, September 25, 2013

Alternative Fall Colors? Check your collection!

Do you ever look at all the new polishes coming out for a season or holiday and say to yourself, "WOW! I'd like to have that! if only I wasn't strapped for money!" I do it all the time! I decided instead to look to my collections for fall-ish colors I already might have. I am a polish hoarder! I have well over 700 polishes and many of them are untried polishes. My Zoya collection is no different. I have over 100 Zoya polishes. I love the colors and finishes of them so much. I decided on three different colors from my Zoya collection that I thought definitely suited the fall season. For me fall is warm colors that represent warm fires in the fireplace, Halloween, and Thanksgiving.

First off is Zoya "Evageline". It is described on the Zoya page as, " A deep rose-pink shimmer with slight gold duochrome and flecks of gold microglitter. An elegant, romantic shade that's always appropriate. " In the bottle to me it looks more brownish-rose colored. On the nail it look brownish rose as well, but does have some hints of pink. I really think the gold shimmer is what gives it the brownish color. The photos I took though just would not show the brown tones.


The second polish I pulled from my Zoya collection that in my opinion was a fall color was Zoya "Anastasia". What I did not realize at the time is that Anastasia doesn't seem to be available on the Zoya site anymore. I would describe it as a shimmery metallic brown. I loved this color on me, and I usually hate browns. I think this color is warm and represents the fall season very well.

 
Lastly, I have Zoya "Charity". This polish is described by Zoya as, "A faded mauve-purple with copper colored duochrome shimmer. A soft shade for poetic nails. " While I did not get much "duochrome" effect with this polish, I did find the copper color shimmer was very visible and pretty. I did not however care for the color on my skin tone at all.


You can purchase Zoya Nail Polish HERE .


These polishes were not provided for me to review or swatch. These are polishes from my own stash, that I paid for. The opinions within are my own.
 

Tuesday, September 24, 2013

Holy Purple Polish Heaven! It's Ellagee "Purple Haze"!

Hello lovely people who have come to check out my blog! I want to ask everyone to please be patient with me on this journey. I find that I get so over excited I sometimes forget important details in my posts. I realized after going back and re-reading my last post that I forgot to put my opinion of the polish in the post! *SMH*! Doh! So, today I am going to try to be more thorough!

Today I have for you a BEAUTIFUL shade of purple holo polish from Ellagee called "Purple Haze". OMG! This formula is so smooth! My photos are of not 3, not 2, but 1 freakin coat! Hello did you see that? ONE COATER! Purple Haze is described on the sale page as "a deep purple with ultrafine holographic shimmer", and boy does it shine! I wish I could have gotten outdoor photos for you! I am in LOVE this polish, and it is going in my fave purple polish pile!

I also have to add, that today is the first day I have EVER used a fimo. I think the little flower is really cute and compliments this polish well! Im still not sold on the fruit and veggie fimo sticks though. Not sure why I would want to wear those on my nails, but I am sure I will find an occasion!

Now for the photos:


This is without flash under an LED light.

 An up close and personal look!
 
 And one with flash.
 
You can purchase your very own "Purple Haze" here at Ellagee's Store!
 
These polishes were not given to me by the maker for review. This is an untried polish from my own personal stash. All opinions contained within the post are my own and not in any way swayed by anyone.

Sunday, September 22, 2013

Mentality "Tenderness" and my first blog post!!!

Hello! Welcome to Covered by Color and my first ever blog post! I'm completely new to blogging about anything nail polish related and look forward to embarking on this new journey! My ultimate goal is to make nail polish in the very near future.

Today did not go as planned at all! It was my initial goal to have a light box made and my fancy camera out. However in the process of working in the yard today I tore two of my nails so I now only have little nubbins! Haha! Then I came down with something! It is extremely difficult to paint your nails and blow your nose at the same time! I had to redo my mani three times!!!

Now onto the polish and my nails! Tonight's polish is from one of my absolute favorite indie polish makers, Mentality! This one is called Tenderness and is from their Black Light collection. It is described on their page as a multi chrome, colors gifting holographic polish. It shifts between red, bronze, and gold. I had complete coverage in one coat, but added a second for durability and lastibility purposes. I absolutely LOVE this color and formula. It went on like a dream despite my runny nose! (AHHHHchoo!) The top coat I used is HK Girl by Glisten and Glow. You can purchase your own Tenderness on Mentality's store page here. Now on to the pictures:


Without flash!!


With Flash!!


This polish was not given to me by the maker. I purchased it myself for my own personal use and enjoyment. The opinions expressed within this blog are my own and were not influenced in any way.